Delivering Paper-and-Pencil Tests
Delivering paper-and-pencil tests is one of the functions of FastTest.
- Paper-and-pencil testing involves simply printing the test after it has been finalized.
- To deliver tests online, you must create test sessions, upload examinee lists, purchase test credits, and then email test codes to examinees or proctors.
Paper and Pencil Testing
When a test has been assembled, it can be printed for paper-based test delivery.
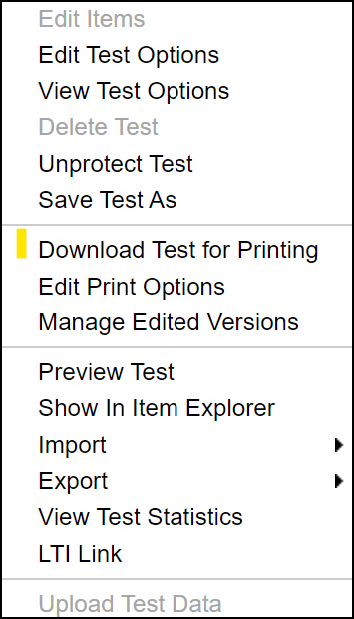
- On the Test Assembler tab, click Print → Download For Printing or right-click and select Download Test.
- You will be presented the choice of format: New PDF (beta), PDF, Doc, and HTML (Figure 7.1).
- If not PDF, you can then edit formatting before printing.
- New PDF (beta) allows for custom templates (see New PDF (beta) section below)
- If downloading a Word Doc, follow these specific instructions
- 1. Log in and go to the Test Assembler tab, which manages all test forms.
- 2. Right click on the form you want, and choose Download Test.
- 3. Select Doc (Microsoft Word) format and Download. It will come in as fullscreen view; use the View tab in Word to change to Print Layout view, where it displays as if on paper pages.
- 4. Remove the html tables.
- You may create or search for a macro that meets your needs.
- Hit Alt+F11 to bring up the macro screen, paste this in the code box, and hit the green Run button.
- Note: If you save this in the Atl-F11 screen, it should stay there forever, for future use.
- You may create or search for a macro that meets your needs.
- 5. Edit as you need; page breaks or anything else you want to do before printing.
- A helpful function is Search and Replace
- For example, searching for Tab characters and replacing with two spaces; this serves to standardize the gap between the answer marker and the answer
- A helpful function is Search and Replace
Figure 7.1: Print Test Dialog
- An important note: the images in these files are linked images. When you first export, they only reference the original image file on the secure FastTest server. If you do not have an Internet connection when you open the document, the images will not show. However, Microsoft Word has a way to embed these images, so that they are permanently independent of FastTest.
- In Word 2007, the user can click the main “Windows” icon in the top left corner, and select “Prepare → Edit Links to Files.”
- Note that this option will only appear if there actually are linked files in the document. A dialog will appear showing each linked image.
- The user can select all of these links and check “Save picture in document” under “Options for selected link,” then click OK.
- The images will then be part of the Word file itself, which will substantially increase the file size.
- Unfortunately, there is no similar “Prepare → Edit Links to Files” in Word 2003, but there is a keyboard shortcut.
- In Word 2003, the user can select each image and press CTRL + SHIFT + F9 to embed the image.
- To save time, the user can also CTRL + A to select the entire document and then press CTRL + SHIFT + F9.
- In Word 2007, the user can click the main “Windows” icon in the top left corner, and select “Prepare → Edit Links to Files.”
Print Options
FastTest offers some control over the document that will be saved for printing.
- To configure the available options, click Print → Edit Print Options (with the test selected) or right-click the test and select Edit Print Options.
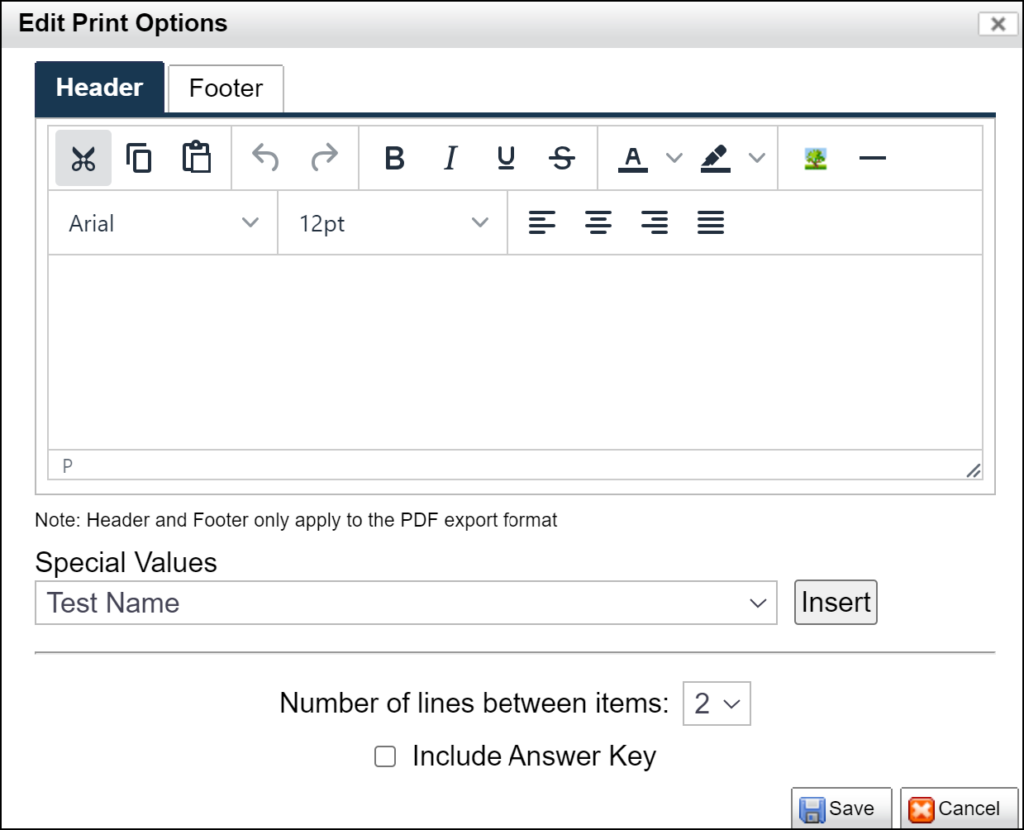
- The dialog shown in Figure 7.2 will appear.
- For PDF outputs, header and footer texts can be entered.
- These texts will appear at the top and bottom of every page (respectively) and can contain special values for, e.g., current page number and test name.
- The number of blank lines between each item can be specified via a drop down menu.
- The test’s answer key can optionally be included as the last page in the document via a checkbox.
Figure 7.2: Edit Test Print Options Dialog
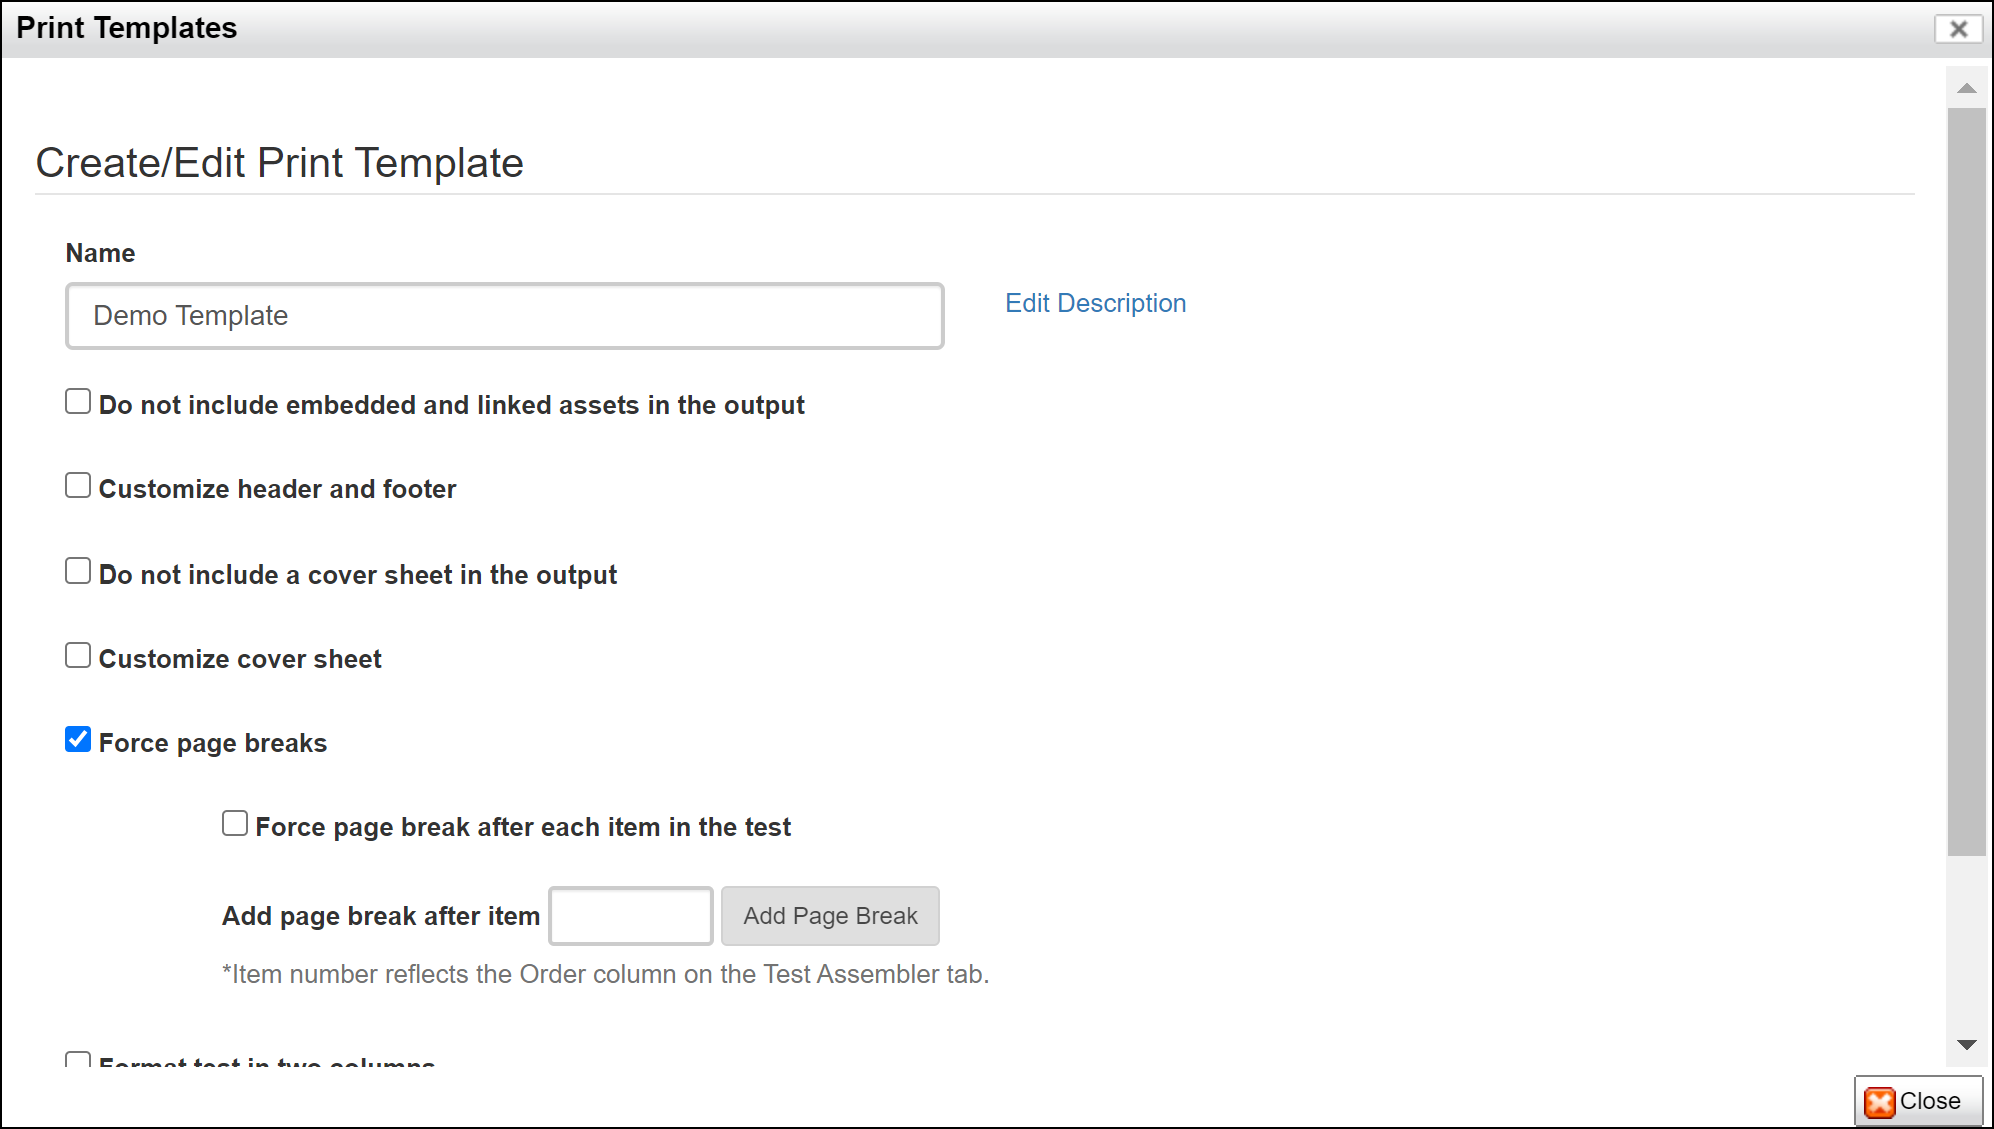
- New PDF (beta) options
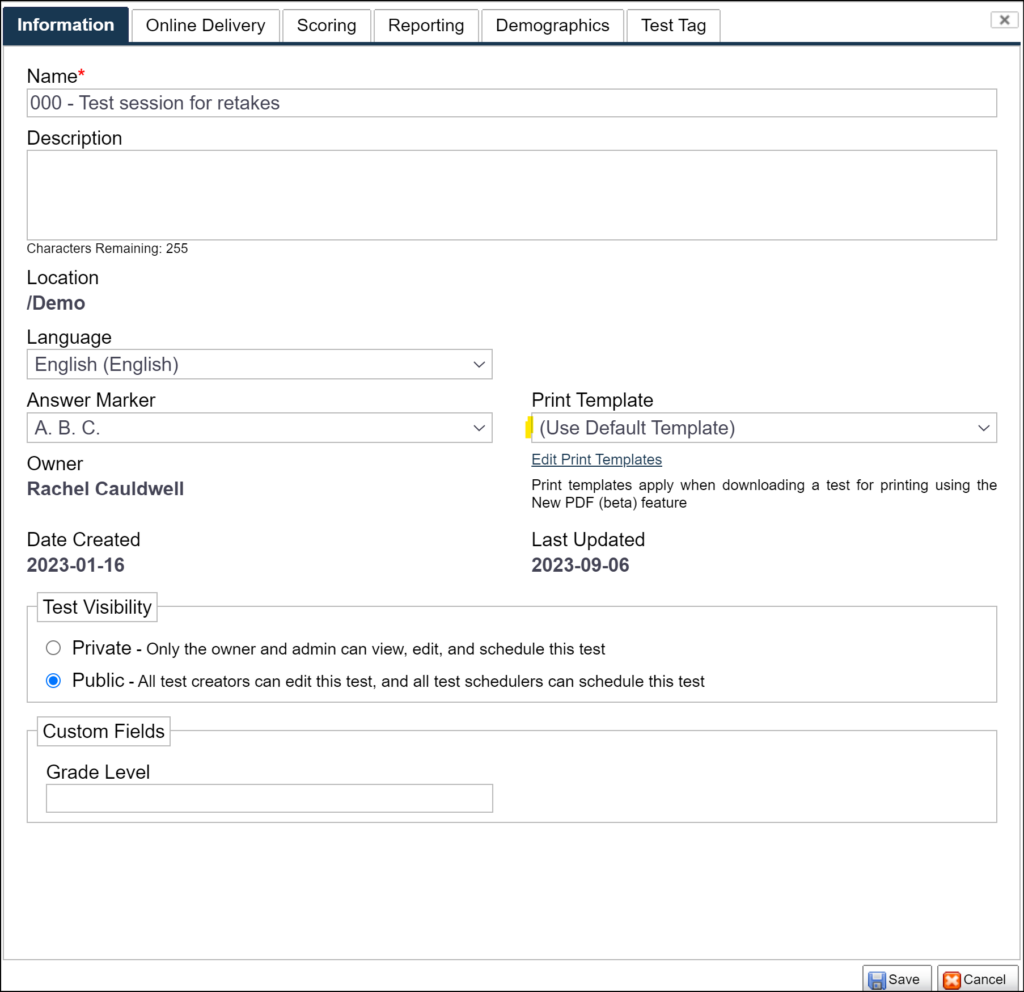
- Under the Test Assembler tab, right-click on the test and select Edit Test Options
- Under the information tab click on Edit Print Templates (found under the Print Template drop-down menu)
- Select New to open the window shown below to create a new PDF print template
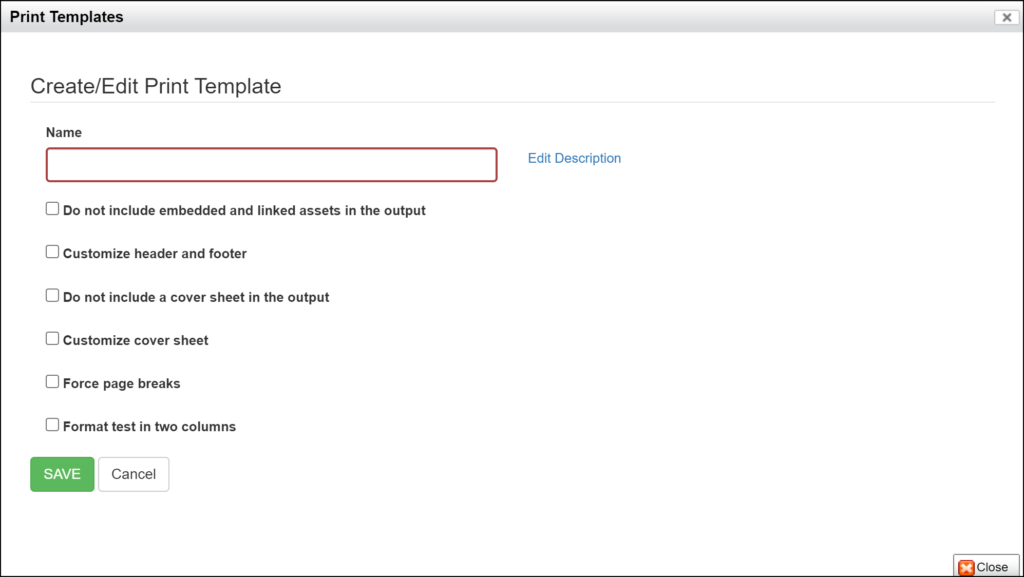
- Template options
- Do not included embedded and linked assets in output
- Removes any link text
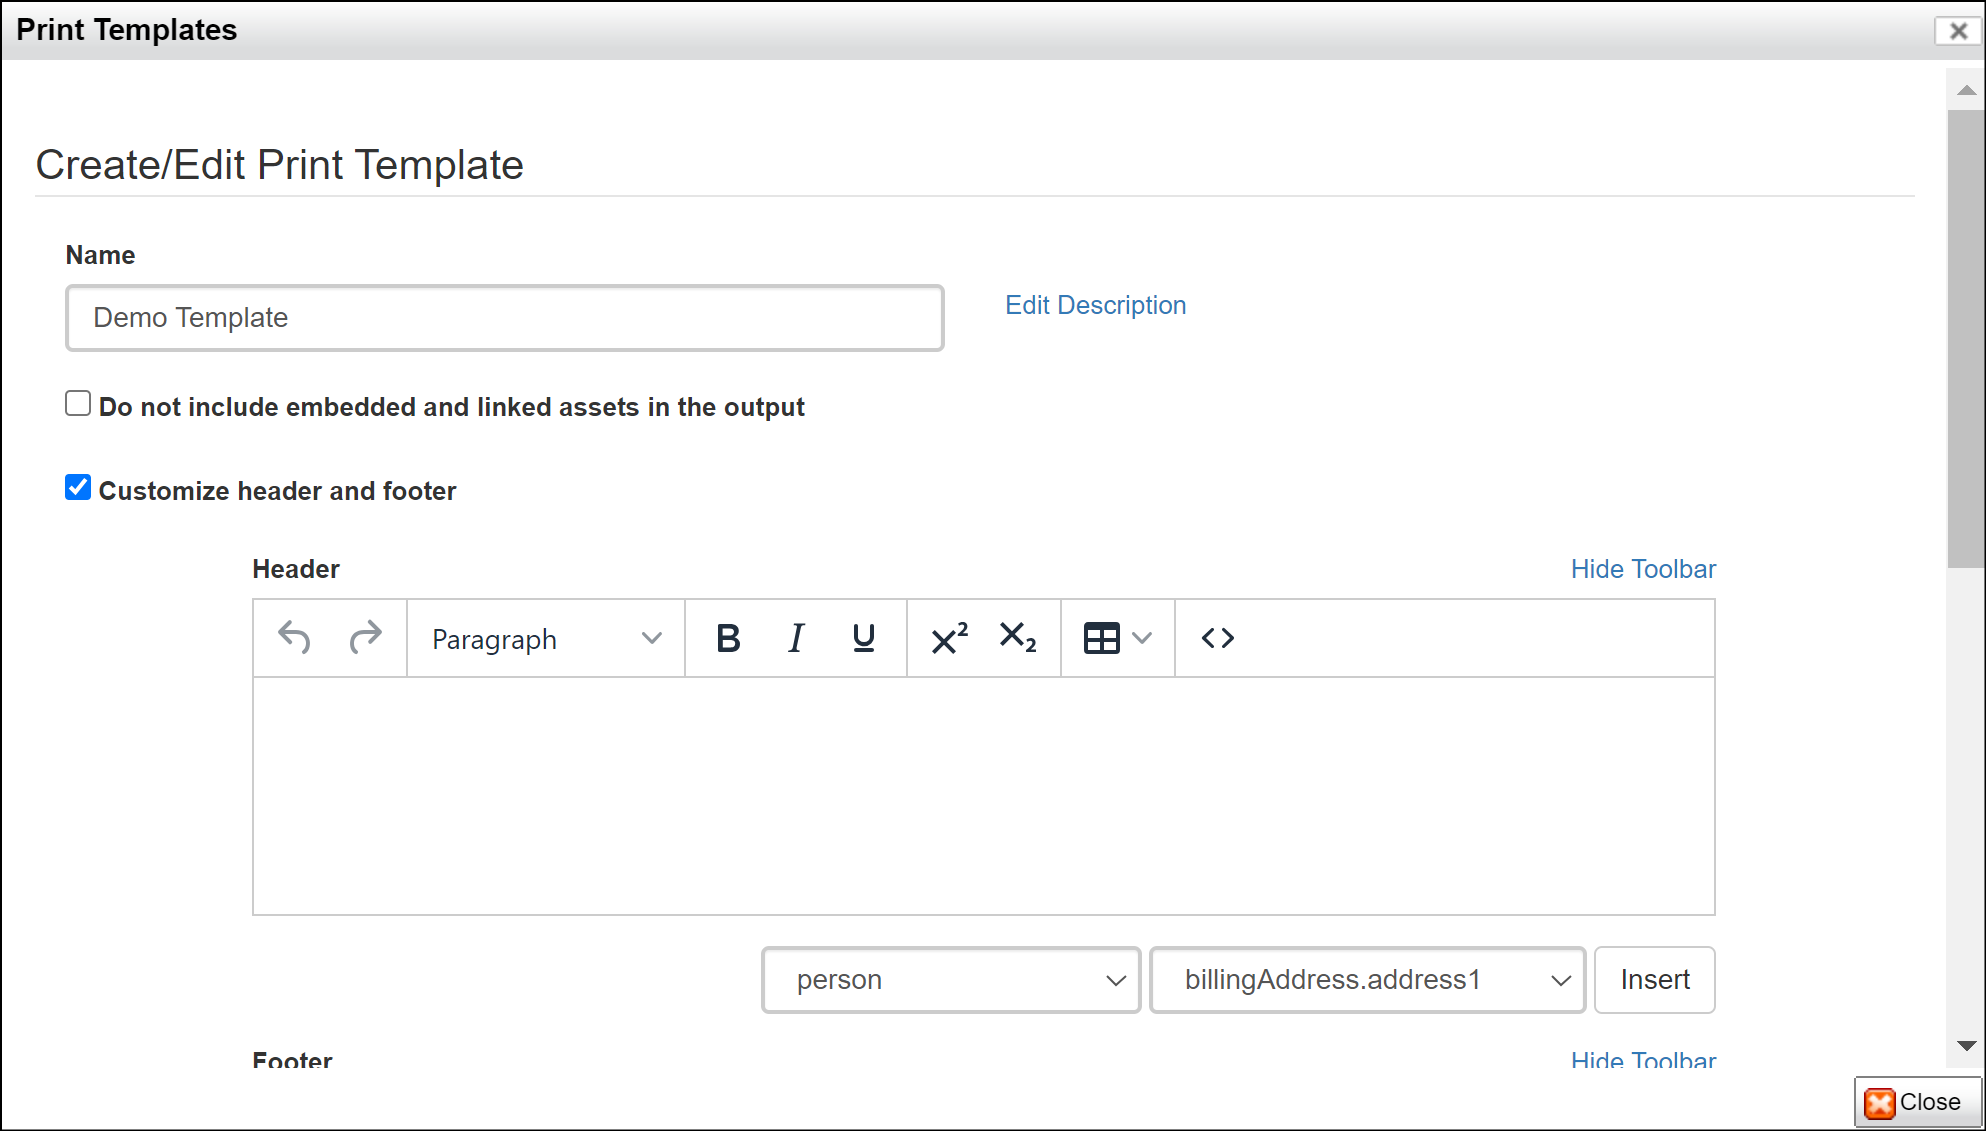
- Customize header and footer
- Allows user to utilize HTML markup to add a header and/or footer to each page of the PDF print out
- Logos, page numbers, etc
- Use the drop-down options to insert various special value
- Allows user to utilize HTML markup to add a header and/or footer to each page of the PDF print out
- Force page breaks
- Page breaks can be set to occur after specified items based on the Order column on the Test Assembler tab
- Page breaks can be set to occur after specified items based on the Order column on the Test Assembler tab
- Format test in two columns
- Column breaks can set to occur after a specified item

- Column breaks can set to occur after a specified item
- Do not included embedded and linked assets in output
- Click Save
- The newly created template will now be listed
- Click Close
- To select a saved template to use when downloading and printing to PDF, use the Print Template drop-down under the Information tab
- Click Save to return to the Test Assembler tab
- Follow the Download test for printing instructions outlined above
Storing Edited Versions
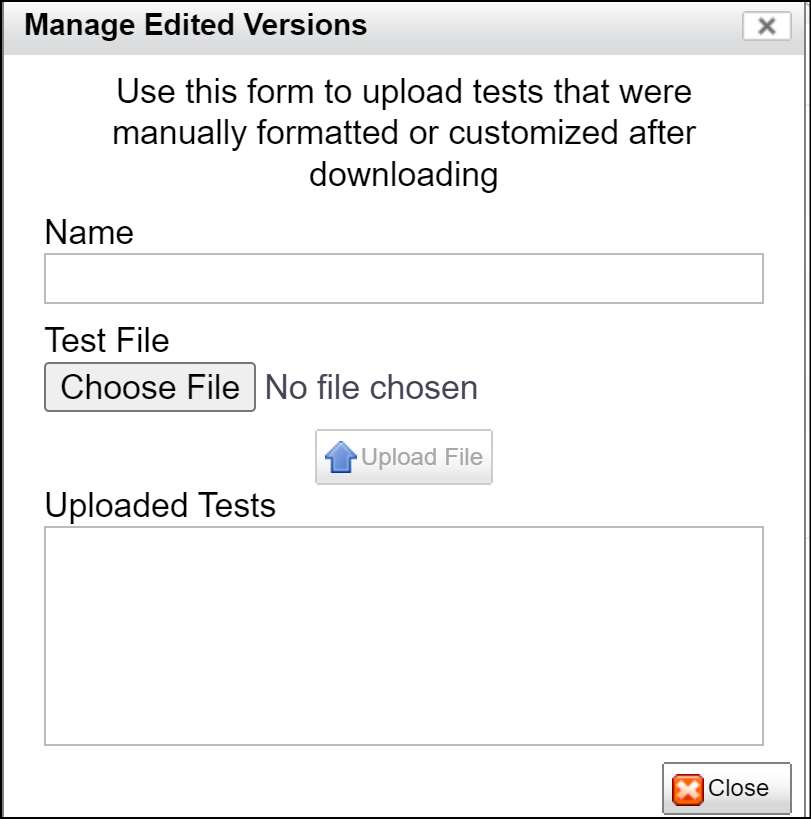
Once you have downloaded the test file, you may want to make further modifications to it. For example, you may want to add a header and footer or adjust the spacing of an item. FastTest enables you to upload a test file that was modified in order to keep it accessible to your workspace.
- Figure 7.3 shows the dialog for uploading. You can access it by selecting your test and clicking Print → Manage Edited Versions or right-click the test and choose Manage Edited Versions.
- A test file stored here can be downloaded by anyone with access to the test.
Figure 7.3: Manage Edited Versions Dialog
Uploading Examinee Responses
Examinees tested via paper-and-pencil can have their responses uploaded into FastTest to be scored. Each examinee whose responses are uploaded in this way to be scored and stored requires one-half of a test credit.
Importing Responses
For examinees that have not yet been registered:
- Under the Test Assembler tab, right-click on the protected test and select Export -> Import Responses Template

- Each row corresponds to an examinee, and must include the following columns
- First name
- Last name
- Test session name (must be protected)
- Automatically included in export of template
- Test name (must be protected)
- Automatically included in export of template
- Responses (Resp 1, Resp 2, etc) to each item in the same order that they appear on the test
- Answers can be specified using A, B, C, D or 1, 2, 3, 4
- Instructional items are not included and do not need a column
- Other columns are optional
- Group Path column will import the examinee responses into the specified Examinee Group
- If column is left blank a new group will be created and examinee(s) can be dragged to the appropriate group if needed
- Save the newly created file when completed
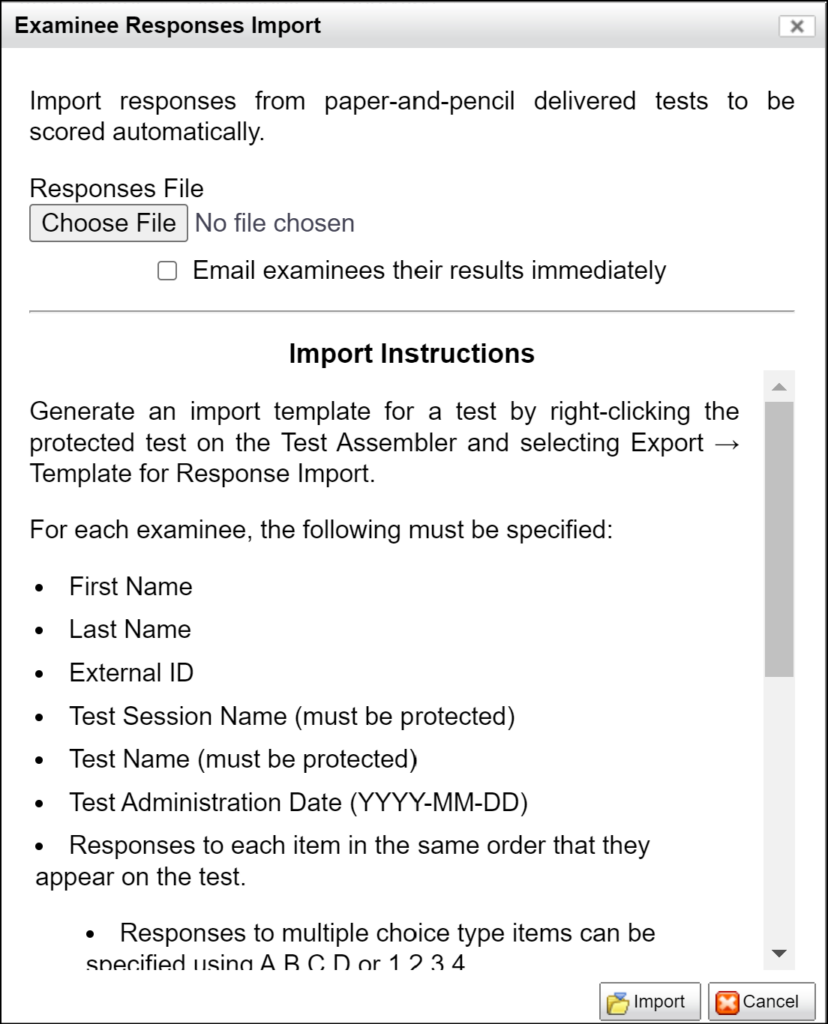
- Under the Test Scheduler tab click the Import button and select Import Responses
- Click Choose File and select the saved file created using the Import Responses Template
- An email is sent upon completion of the import
- Click Sync to refresh your browser if upload is not appearing
For examinees that have previously been registered:
- Under the Test Scheduler tab, select one or more examinees and right-click. Select Export > Import Responses Template
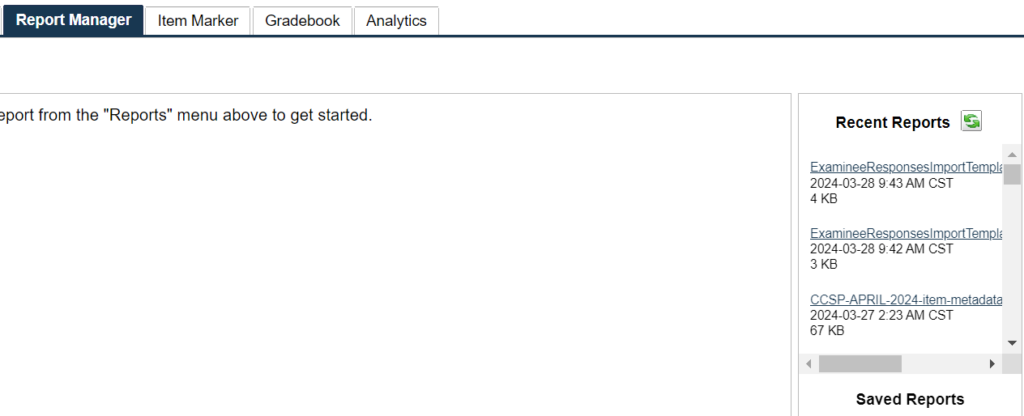
- The file will download and be available under the Report Manager tab
- Click Sync to update the page if the report does not appear (may take a few moments depending on file size)
- Click on the file to open
- Each row corresponds to an examinee
- Required columns will automatically be filled and are marked with a *
- Test Code
- Form ID
- Fill in responses (Resp 1, Resp 2, etc) to each item
- Answers can be specified using A, B, C, D, or 1, 2, 3, 4
- Instructional items are not included and do not need a column
- Other columns are optional
- Note: Additional column fields may appear in the template if they pertain to the registered user
- Save the newly created file when completed
- Under the Test Scheduler tab click the Import button and select Import Responses
- Click Choose File and select the saved file created using the Import Responses Template
- An email is sent upon completion of the import
- Click Sync to refresh your browser if upload is not appearing
Legacy Import
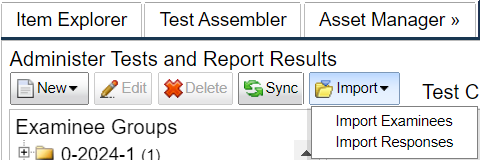
To import examinee responses using the Legacy CVS Import
- Click on the Import drop-down menu > Import Responses
- Click Download the example legacy responses file – this will appear in under the Report Manager tab
- Each row corresponds to an examinee, and must include the following columns
- First name
- Last name
- Test session name (must be protected)
- Test name (must be protected)
- Each item on the test (q1, q2, q3, etc) in the same order that they appear on the test
- Answers can be specified using A, B, C, D or 1, 2, 3, 4
- Instructional items ARE included and need a column
- For example, if the instructional item is the first item presented to the examinee it will correspond to the “q1” column
- Other columns are optional
- Under the Test Scheduler tab click the Import button and select Import Responses
- Click Choose File and select the saved file created using the Import Responses Template
- An email is sent upon completion of the import
- Click Sync to refresh your browser if upload is not appearing.