Creating Test Session Information
Creating Test Sessions
- To create a new test session, click the New button.
- The test session will be created in the currently selected test session folder.
- If no folder is selected, a “Test Batteries” folder will be created and the test session placed inside of it.
- To edit an already existing test session, simply click the on the test session’s name.
- A test session is locked while it is being edited to prevent users from overwriting each other’s changes.
- If the test session is locked by another user when its name is clicked, you will be presented with a read-only view of the test session and a message stating who is currently editing it.
- Workspace administrators have the power to override someone else’s lock, but that user will lose all of his or her changes.
Whether creating a new test session or editing an existing one, the user will be brought to the test session detail view. The view is like many of the other dialogs in FastTest. The difference is that it takes up the whole page.
Note: Help icons are placed throughout the test session detail page and can be clicked to display more detailed information.
The Information Tab
Figure 5.2: The Information Tab
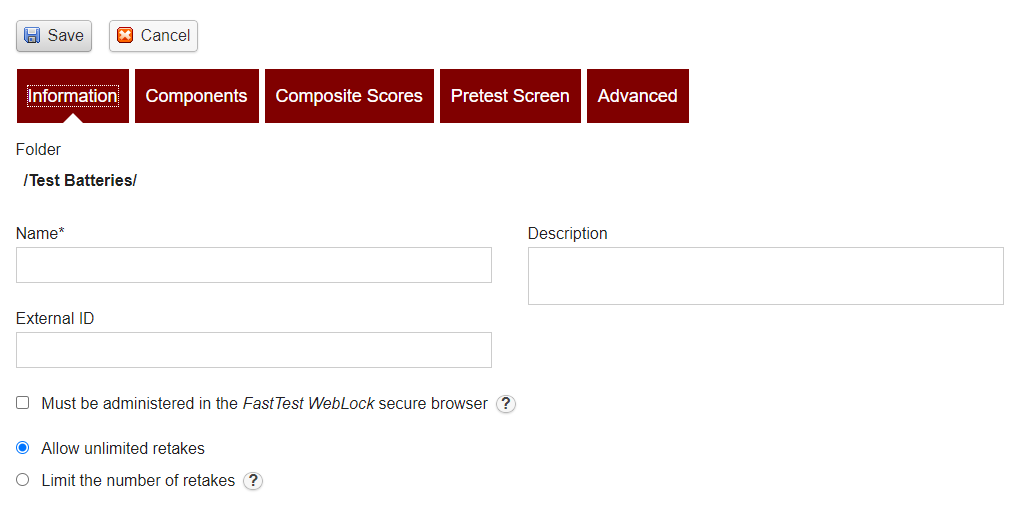
- The information tab allows configuring a test session’s general information.
- Name (a required field) and description are familiar fields.
- The location field specifies the path to the test session folder where the test session exists (or will be created).
- Users have the ability to control the number of times a test session can be retaken when examinees utilize a group test code or API registration (note: defaults to unlimited).
- If the option “Must be administered in the FastTEST WebLock secure browser” is turned on (checked), then an examinee must use the FastTest WebLock browser when taking the test. See Appendix F for more information regarding FastTest WebLock.
- The Information Tab is also where sharing with subworkspaces can be controlled.
- Subworkspaces allow you to create “child workspaces”.
- “Parent workspaces” can then share test sessions with their child workspaces.
- The child workspace can customize (override) the shared test session’s scoring and delivery options, however, child workspaces cannot edit the items in the test sessions that come from parent workspaces.
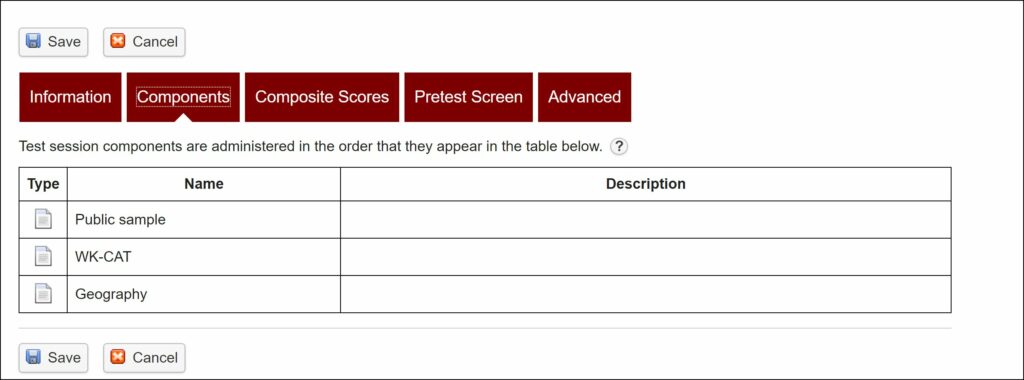
The Components Tab
Figure 5.3: The Components Tab
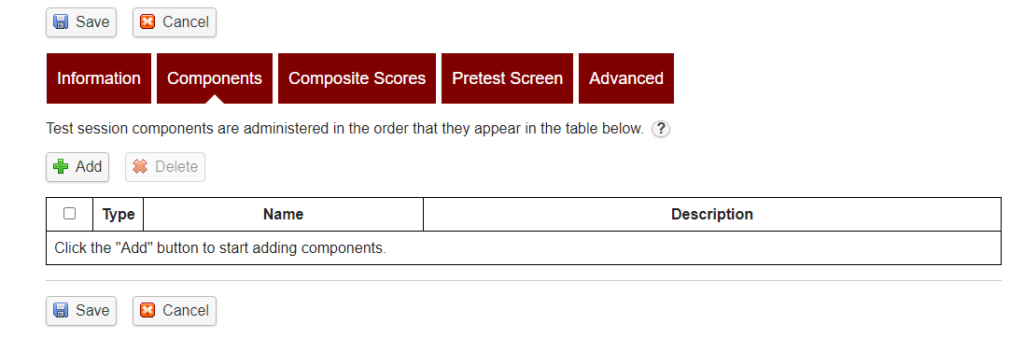
- Test sessions are made up of components, and those components are configured on this tab.
- The components that have been added to this test session are displayed in the table.
- The order they appear in the table is the same order that they will be administered to the examinee.
- Components can be reordered by drag-and-drop on the leftmost column.
- To add a component to the end of the list, click the Add button. A new screen will appear that displays all of the test session components in the workspace:
Figure 5.4: Test Session Components

Components can be selected by checking the box next to the component and clicking Add. Added components will display a special icon instead of a checkbox.
Note: If the test session is protected, its components cannot be deleted or reordered and new components cannot be added.
The Composite Scores Tab
Figure 5.5: Composites Scores Tab
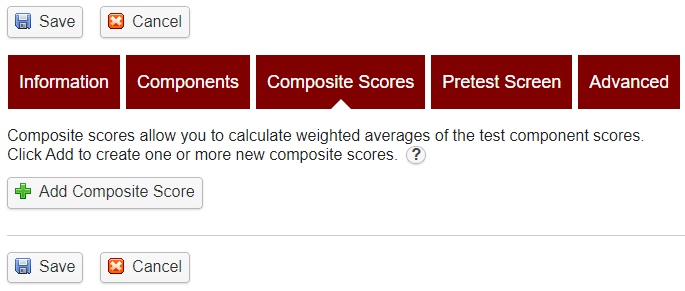
- The Composite Scores tab allows you to combine the scores for two or more components, i.e. tests, given in a test session, to create a final “super score” referred to as a composite score.
- This option is only offered in test sessions that contain multiple components.
- Clicking on the Composite Scores tab in a single component test session will open the tab; however, the “Add” button has been removed since there is nothing to combine across tests if there is only one test.
- You are allowed to create multiple composite scores within a session.
- For example, supposed you had a battery of three numeric ability tests (Algebra, Geometry, Arithmetic) and three verbal ability tests (Vocabulary, Grammar, Reading Comprehension). You might want to create three composite scores: Numeric, Verbal, and Overall.
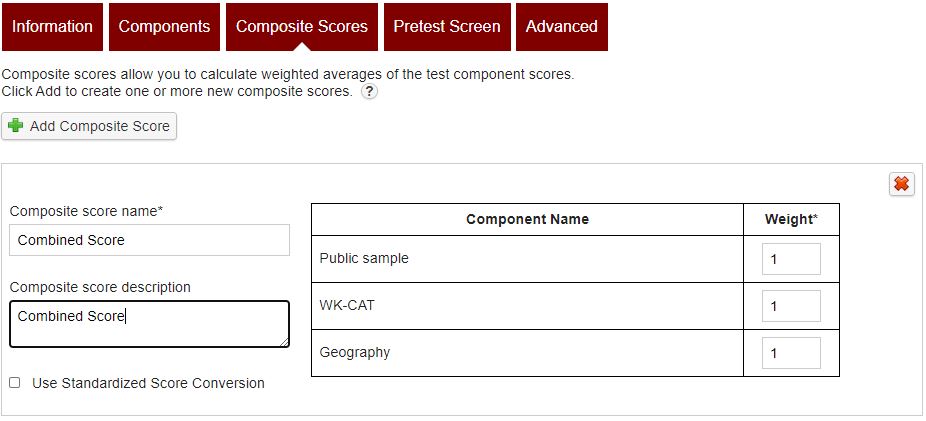
In order to generate a composite score, each component must be given a specified weight, which determines how the composite score will be calculated.
- The composite score will be calculated by multiplying the test scores by their weight, summing the results, and divided by the number of nonzero-weighted components.
- Therefore, giving each component a weight of 1.0 will calculate the average score.
- Giving each component the weight of n if there are n components will calculate an overall sum score.
- In the example below, the three components (Public Sample, WK-CAT, Geography) are given equal weights of 1. Therefore, the three scores will be added and then divided by 3 to calculate an average score. If each weight was 3.0, then the three scores would be summed.
It is important to consider the test scoring method that you are using before setting up a composite score. If your tests are on very different scales, the composite score might be meaningless. Also, a sum score of IRT-based θ estimates would be difficult to interpret because it would devolve from the standard scale; an average score would be much more meaningful.
- The composite score can be found by going to the Test Scheduler tab and exporting data (Export -> Examinee Data) for an entire group or a specific examinee.
- The spreadsheet will include data for all component scores and also now have a column for the composite score.
- Note: when scheduling an examinee for a test session that includes multiple tests the test scheduler will create a line for each test, however, they all will share a test code.
The Pretest Tab
Figure 5.6: The Pretest Tab
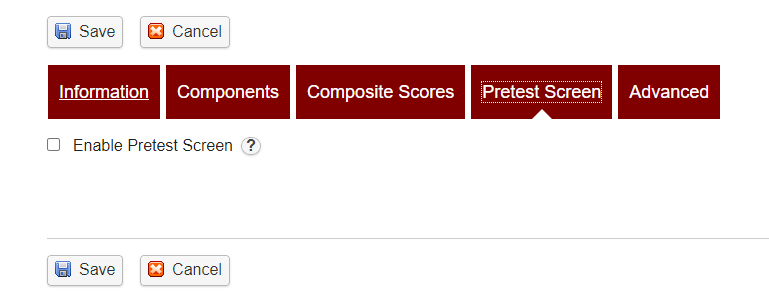
- Test sessions can optionally include a message prior to the start of the test session.
- This message could be used as a confirmation screen, displaying the examinee’s name and the test information.
- Special values can be selected from the drop down and inserted into the message for dynamic data, like the examinee’s name.
- The examinee will have the option to “Start Test” or “Cancel.”
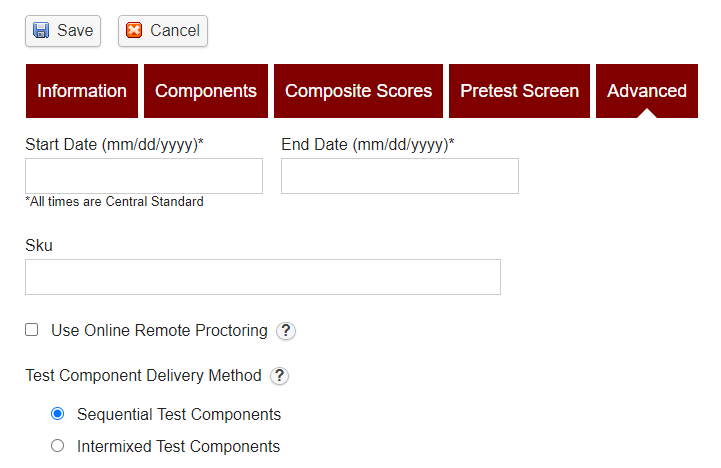
Advanced Tab
- Test sessions have the option of having a specified start and end date as an availability window.
- “New” tests cannot be started outside of the indicated time period.
- Checking the Use Online Remote Proctoring box designates that the test can only be delivered at one of the selected remote proctoring sites.
- The Test Component Delivery Method defaults to test components being administered separately to an examinee one after the other.
- Changing this specification to Intermixed sets the tests to be administered together to appear like a single test.
- For example, suppose you are delivering a personality assessment with ten components and hope to prevent examinees from “faking good” on certain scales. Items from all ten scales would be intermixed so that it would not be as obvious to the examinee to which scale the item on the screen is assigned.
Figure 5.7: The Advanced Tab