Appendix I – Quick Start Guide for Administrators
Welcome to FastTest, the world’s leading online testing and item banking system. This Quick Start Guide provides a brief overview of how to use the system effectively. There are two sections: Administrators and General Users. A complete manual with step-by-step details is always available through the link in the upper-right of your screen (see figures below). For any questions not covered in the manual, please contact support@assess.com.
Administrator Dashboard
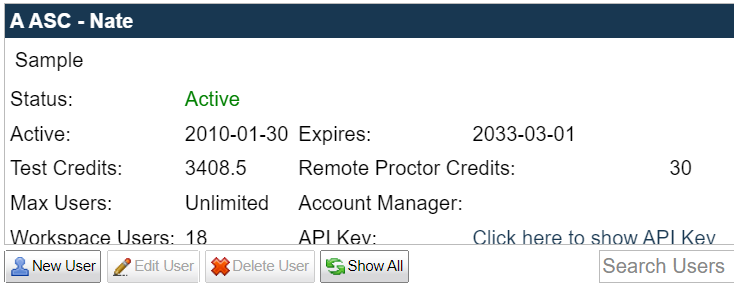
Once the admin user name and password have been entered in the admin login page, the workspace landing page shown in Figure 1.1 will appear. The landing page will display the workspace active and expired dates, how many test credits are available, how may users your account can have, and the users that are currently in the system. The workspace can be modified through the Configure tab. The appearance, user properties, and item properties can also be edited through this tab. It also lists all the users in your workspace, and allows you to manage their accounts.
Figure 1.1: The Workspace Administrator Landing Page

Part 1: Configuring Your Workspace
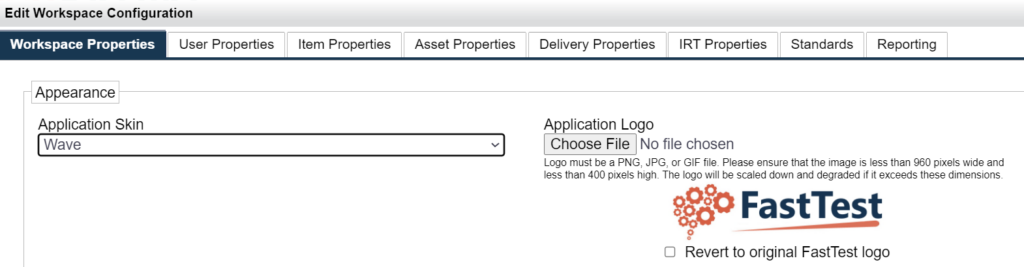
To configure your workspace, select the Configure tab at the top left corner of the workspace (Figure 1.1). Select ‘Click here to customize branding’ to open the window show in Figure 1.2.
Figure 1.2: Configuring the Workspace
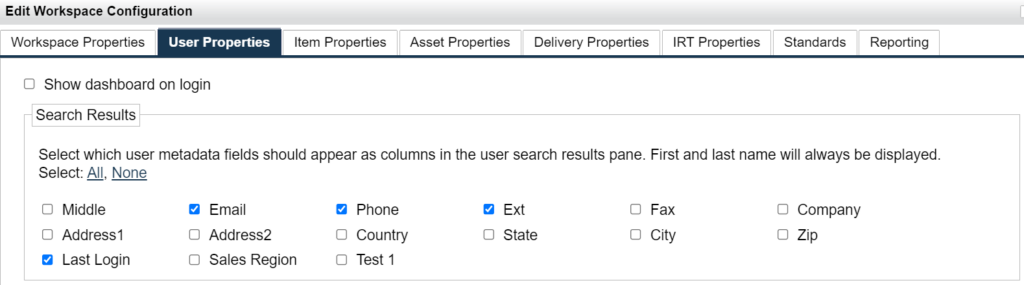
User Properties refers to fields associated with your users.
Item Properties (Figure 1.3) refers to fields associated with your items. If you are using IRT, you specify the value of D on this tab. You also provide descriptive labels for your user-defined statistics on this tab.
Figure 1.3: The Item Properties Tab

The Asset Properties tab simply provides the option to allow duplicate asset names. If the box is unchecked and a duplicate name is attempted, the user will get a message alerting them that an asset with that name already exists.
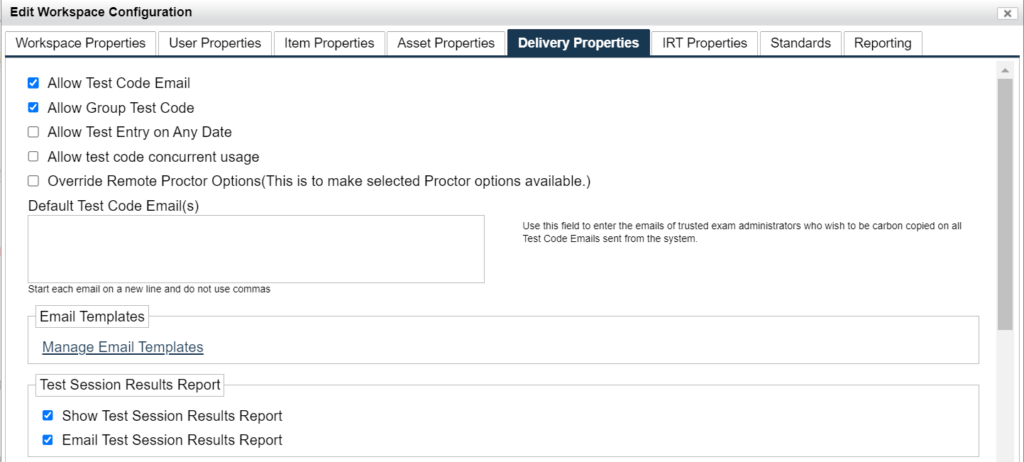
The Delivery Properties tab (Figure 1.4) can be utilized to control the ability to allow test codes to be emailed, and group test codes to be created, and configuring the use of Test Session Results Report.
Figure 1.4: The Delivery Properties Tab
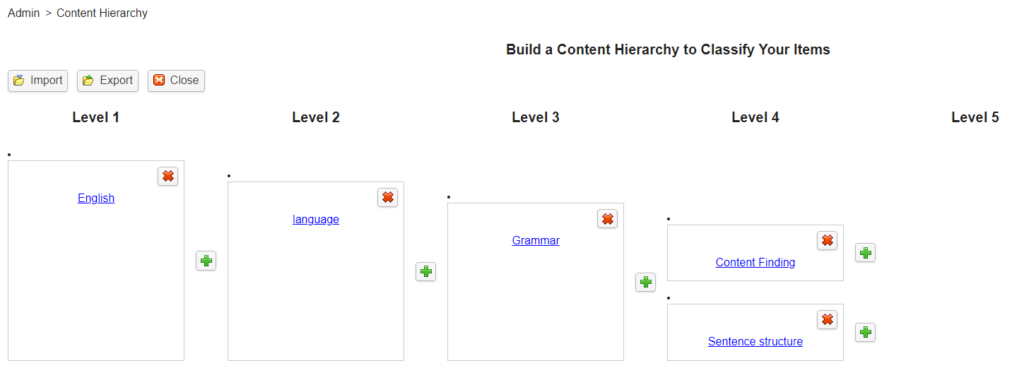
1.2. Content Hierarchy
The Content Hierarchy tab on the administrator dashboard opens a new screen where administrators can define the content hierarchy, also known as blueprints, domains, or standards. Items are assigned to places in the hierarchy to categorize and organize them.
In the example below, Level 1 is History. If a user was creating a content hierarchy for an entire school or multiple certification programs, he/she might have a number of subjects listed as Level 1 content areas. Each level of content breaks down the content areas into more specific categories. In this instance, the first level is the subject, the second level is the area of history, and the third level is a class within that area of history.
Figure 1.5: Content Hierarchy
Only the administrator can define the hierarchy, while it is made available for use by all non-administrators in the item bank. When items are created in the workspace, they can be assigned to a content area (Figure 1.6).
Figure 1.6: Content Area Assignment

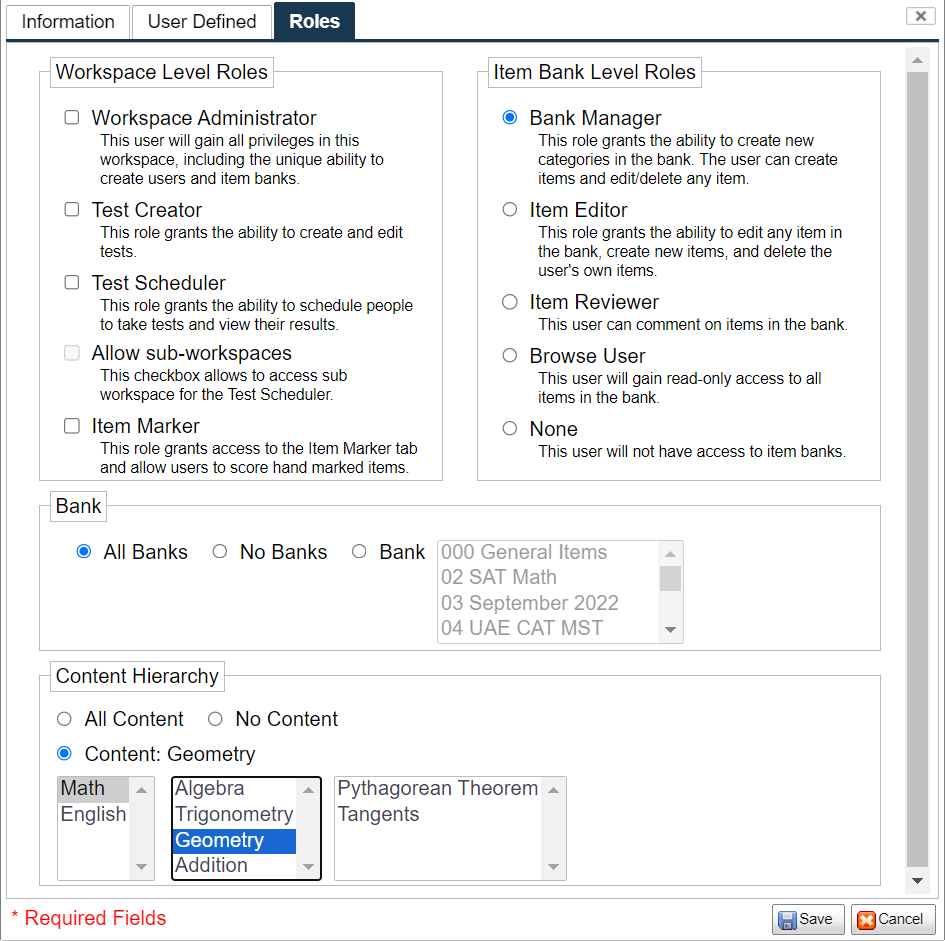
Administrators are able to restrict user access based upon the content hierarchy created. From the workspace administration page, select New User (or select the User you wish to Edit). Under the Roles tab, restrict their access appropriately. See below for an example.
Math Teacher: This teacher will only have access to Math, Geometry.
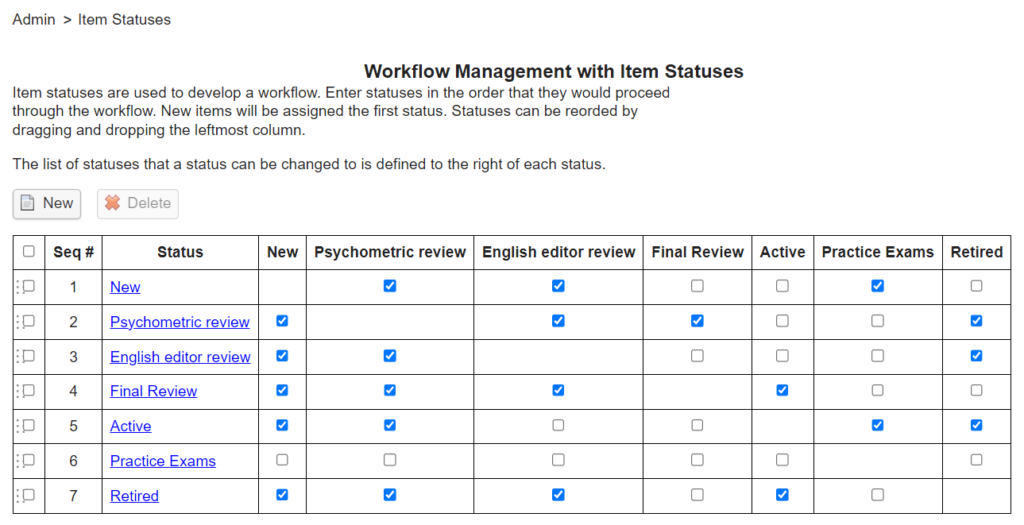
1.3. Workflow Management
The Workflow Management tab allows you to define the statuses you want to use and how the workflow can proceed. Simply establish a list of statuses that represent your stages of item development, from item authoring and item review to active and retired, and the possible paths of status change. For example, you can set the workflow so that an item can only change to “Active” status after being “Review 2” status, which can only occur after being “Review 1” status, thereby requiring that all items be reviewed by at least two experts.
Figure 1.7: Workflow Management
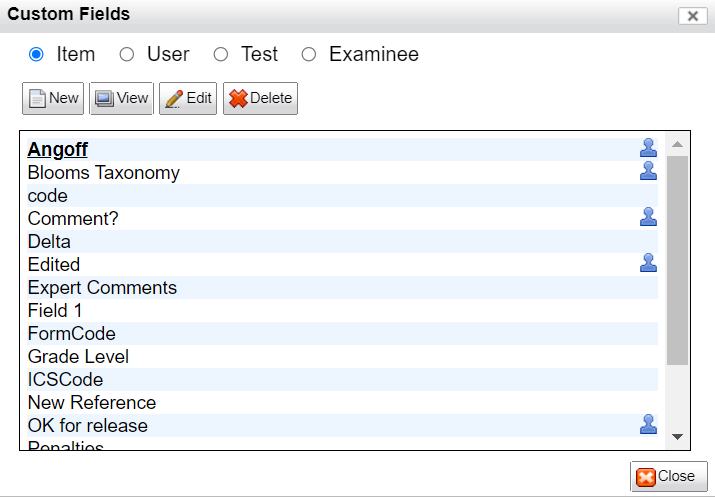
1.4. Custom Fields
The Custom Fields tab (Figure 1.7) on the landing page allows for the addition of new user fields and item fields. Use this if you need a database field that is not already in FastTest. Item fields include review fields, which take input from multiple users.
Figure 1.8: The Custom Fields Box
Part 2: Creating and Editing Users
New users are created by selecting the New User button on the landing page (Figure 2.1). If an existing user is selected from the list, the Edit User and Delete User buttons will be active.
Figure 2.1 The New User Button
The Edit User button allows the administrator to modify user information, including changing or resetting a user’s password.
The window in Figure 2.2 will appear when the New User button is selected
Figure 2.2: New User
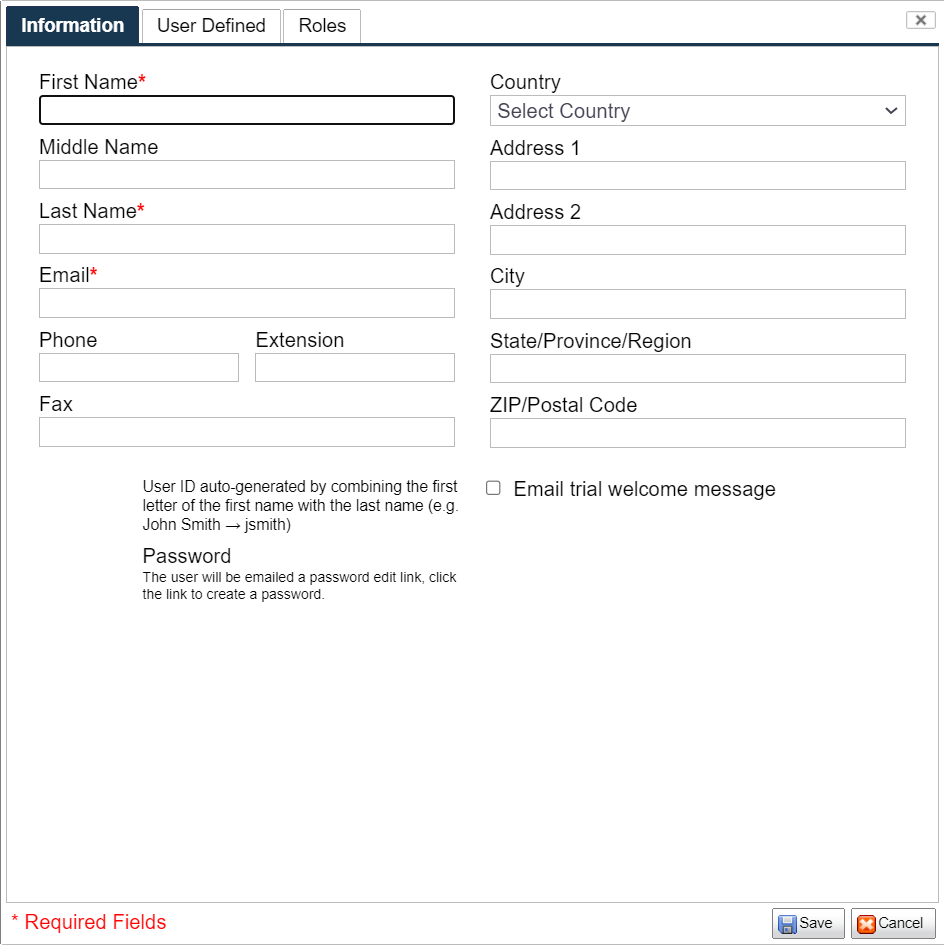
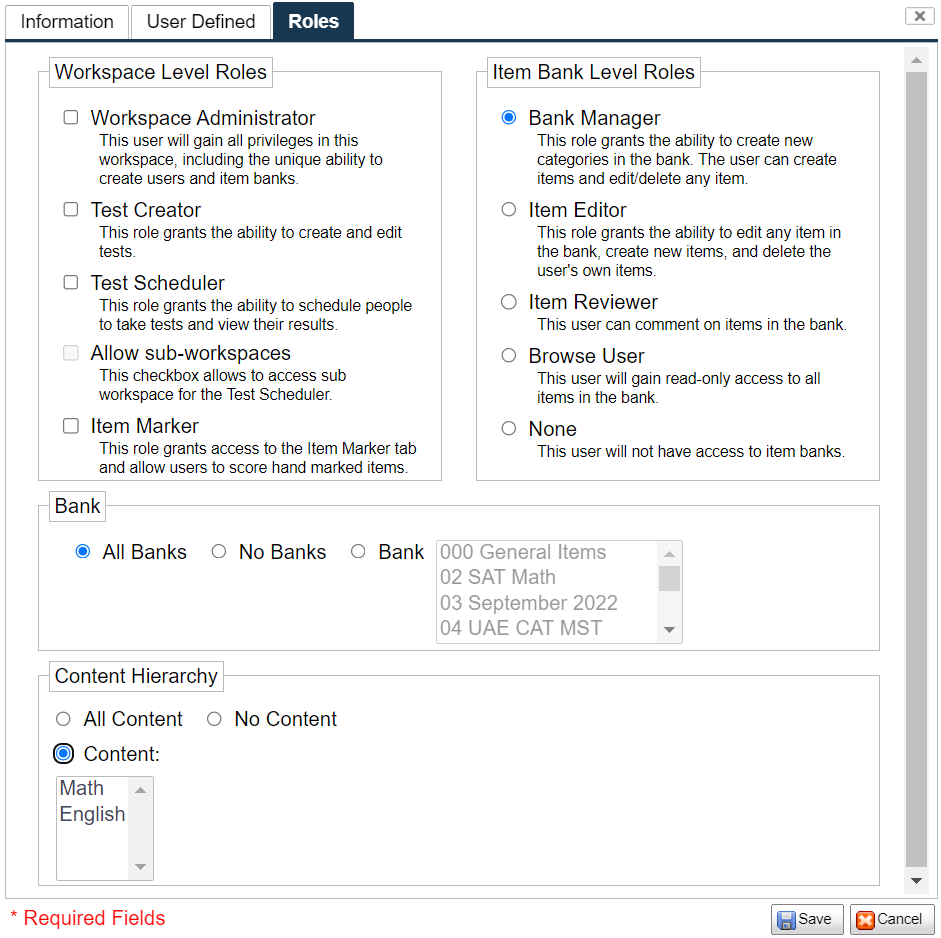
By making selections on the Roles tab, the workspace administrator has control of both workspace and item bank level roles for each user. Each user can have selected roles and be limited to specific item banks. For example, an English instructor can be authorized to only see the English bank, and not the Math or Science banks. Figure 2.3 shows the window in which roles are assigned (the Workspace Administrator role can be created only by FastTest staff). The number of users that a Workspace Administrator can create is determined by the number of user accounts purchased.
Figure 2.3: User Defined Roles