The Item Explorer Tab – Exploring Items, Banks and Categories
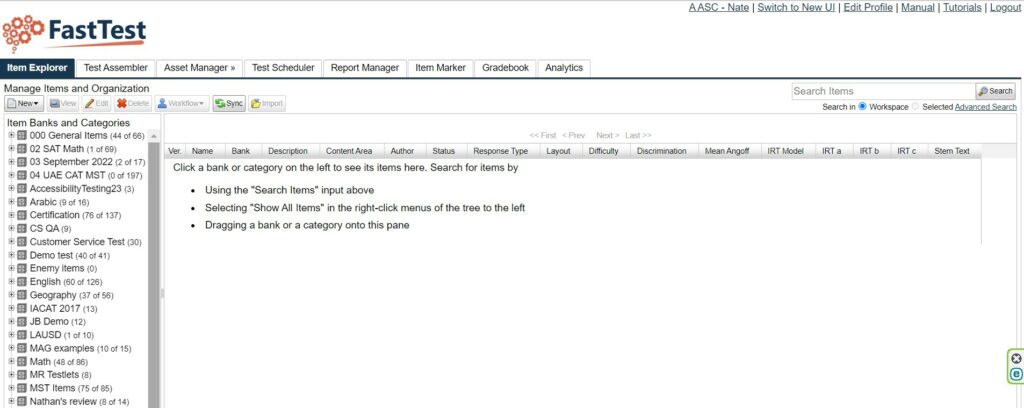
The Item Explorer Tab is where you create items and organize them into banks and categories. Items can be entered directly via your browser or uploaded into the system. The image below shows the landing page for a bank in the Item Explorer, before any items are shown. Note that the main pane on the right (“item search results pane”) gives tips on how to present a list of items.
Figure 3.1 The Item Explorer Tab
Navigating a Workspace
When a user logins into a workspace the module Tabs are visible at the top of the screen.
Note: The modules available will depend on the individual user rights of the user.
The Modules available are: Item Explorer, Test Assembler, Asset Manager, Test Scheduler, Report Manager. Additional modules include: Item Marker and Analytics.
Also note the additional links on the edges of the screen. In the upper right corner of Figure 3.1 on the Item Explorer Tab page, there are five links.
- Clicking on the workspace name link takes the user back to the workspace overview screen (Figure 2.1 on the Workspace page – this is available to workspace admins only).
- Clicking on Edit Profile allows the user to edit personal information as well as change his or her password.
- Clicking on the Manual link will open this manual, and the Help link is an email link to support@assess.com.
- Clicking Logout will log the user out of FastTest.
At the bottom of the screen is the logo for Assessment Systems Corporation, the developer of FastTest. The user can click on the logo to visit the company’s website. In the center of the bottom are additional links to return to the workspace overview page, to logout, to access the manual, and to send a request for support email, as well as a link to the Terms of Use for FastTest. The current version of FastTest is also displayed.
Creating Banks and Categories
Having created a workspace to store your items and tests, the next step is to open one or more item banks into which you will save your questions/items and from which you will select items to create your tests.
- To create a new bank, select New → New Item Bank with the button above the item bank listing. A dialog box will then open in which you name your item bank and provide a description of it.
- Note: only workspace administrators can create banks.
FastTest item banks are designed to accommodate hierarchical structures so that your item banks can reflect the structure of a curriculum, the requirements of large item banking projects, or any other application for which structured item banks are useful.
- You can place items in any category of the hierarchical item bank structure.
- Items can be freely moved (by drag-and-drop) among the categories within an item bank or between item banks within a workspace.
- In addition, item bank categories (including all of the items in them and subcategories below them) can also be moved both within and between banks by drag-and-drop.
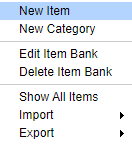
The menu of category commands is available by right-clicking on any category. In addition to creating a new item or category, you can edit the category information and delete the category.
- The menu also contains commands regarding the items in that category
- Show all items in the item listing
- Export items
- Import statistics for existing items
- Export statistics of items.
When you create a new category, or edit an existing category, you will see a dialog with two tabs, as shown in Figure 3.2 below.
- The Information tab contains the name, short description, and location (path) of the category within the bank.
- The second tab is a larger text field that allows you to record specific objectives or guidelines for items in that category.
These objectives will be visible whenever a user is editing an item, to remind them exactly what content or other information items in a given category must take into account.
Figure 3.2: Edit Category Dialog
When creating a new category, you can also create any number of subcategories at the same time by specifying the folder path for the subcategories on each line.
- For example, if you needed to create a category named Algebra with three subcategories named Linear, Quadratic, and Graphs, you would paste the following into the Name field:
Algebra/Linear Algebra/Quadratic Algebra/Graphs
If you are creating a new bank and already know the folder structure you wish to use, this method allows you to create the entire folder structure at once.
Viewing Banks, Items, and Categories
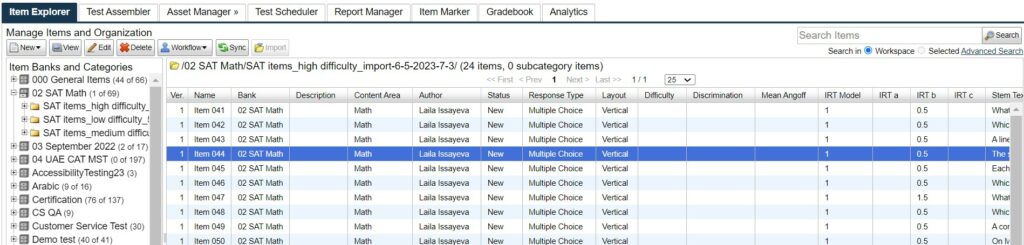
After banks and categories are created or imported, they are visible in the Item Explorer Tab. The same is true for items. Figure 3.3 below is showing a list of items in a Math bank.
- The number of items in the bank or category is presented in parentheses as (x of y).
- The first number indicates the number of items contained in the immediate root of the folder while the second number indicates the total number of items at all levels within the folder.
- In this example, there are 11 items in the Math bank; 3 are in the root, while the remaining items are in categories (Algebra, Arithmetic, Calculus, & Geometry).
Figure 3.3: Item Explorer showing a list of items
Note: if you import categories and their items, they will not be immediately visible on the screen. You need to click the Sync button so that the screen shows the state of your bank after the items have been imported. You will receive an email when the import is complete.
The Item Explorer is similar to Microsoft Windows Explorer, in that items are arranged in a nesting system of folders, which can be moved by drag-and-drop, renamed, and minimized/maximized by clicking on the plus/minus sign.
- To view a list of immediate items in a category or bank, click the category or bank’s label.
- To view a list of all items contained in a bank or category, drag the bank or category into the list space or right click the bank or category and select Show All Items.
- Large numbers of items are paginated; you can control the number of items per page, and which page to view, immediately above the list.
Copying an Existing Item
An existing item can be copied by right-clicking on the item in the list of items (Figure 3.3). A menu will appear with an option to Duplicate Item. Items can be selected and moved (by drag-and-drop) from the list of items to a bank or category on the left.
Adding Items to Your Banks
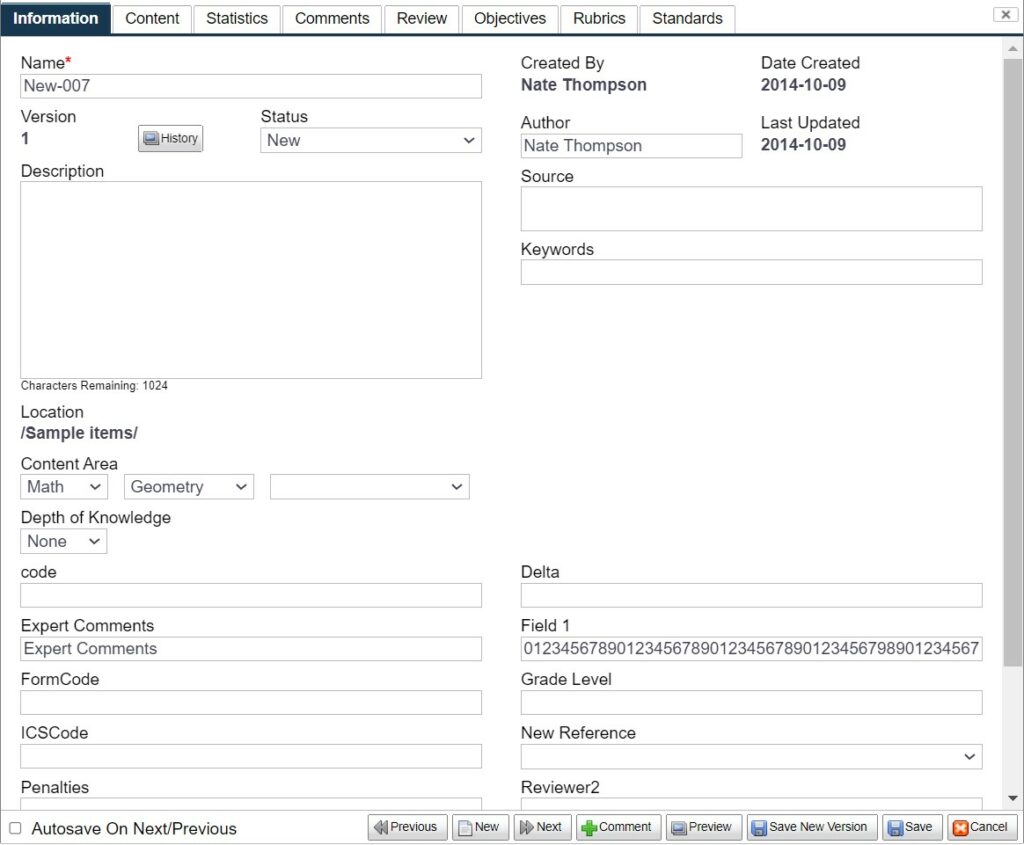
FastTest provides two ways for you to enter items into your banks: directly through the Edit Item dialog, or with import files. The Edit Item dialog (Figure 3.4) appears when you create a new items or open an existing item.
- A new item can be created by clicking the New button, or by right-clicking any bank or category, and then selecting New Item.
- Note: In order to create a new item via the New button, the bank or category that will contain the item must first be selected.
Figure 3.4: Edit Item Dialog – Information Tab
Creating Items Directly in the FastTest – Edit Item Dialog
The Edit Item dialog contains six default tabs.
- The Information Tab records basic information about the item, such as name, version status, and author. It also lists all tests that currently use the item.
- The Content Tab is where you enter the text of the item and the answers.
- The Statistics Tab holds item statistics and graphs IRT functions.
- The Comments Tab records comments made on the item by reviewers.
- The Review Tab provides a summary of the values for custom fields used for review.
- The Objectives Tab simply presents the objectives of that category to provide guidance to item writers.
These tabs will be discussed in more detail below, under Editing Items.
Importing Multiple Items From a Word Processor or Text File
Existing banks can be imported in six different formats
- QTI 1.2 (Question and Test Interoperability) .xml
- QTI 2.1 .zip
- Word .xml
- Tagged rtf/txt file (@@signs)
- Simple, text-based import .txt
- Excel .xlsx
- To import items, click the Import button or right-click on a bank and select Import → Items.
- A dialog window (Figure 3.5) will then appear where you specify the path of the file to import and the destination bank.
- Note that file uploads are limited to 100 MB, so it might be necessary to separate your files before importing. Optionally, you can have a uniform style applied to the items that are imported. This style can be defined differently for each bank (on the Formatting tab of the Edit Bank dialog).
- The menu of commands from right-clicking on a bank is shown in Figure 3.6.
Figure 3.5: Item Import Dialog
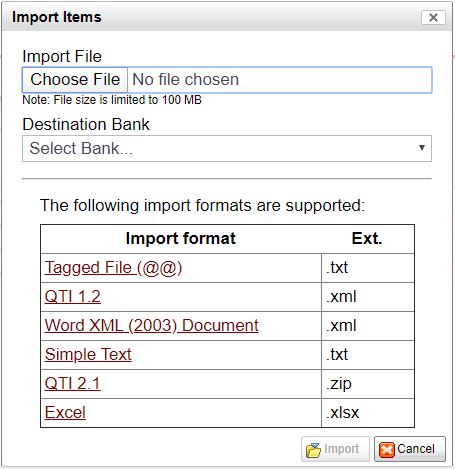
Figure 3.6: Item Bank Right-Click Menu

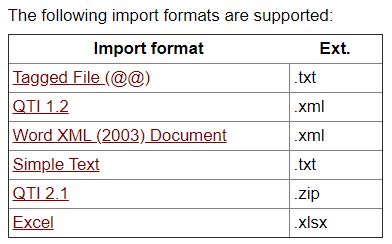
FastTest supports the following import formats:
To find out which import method is best for your needs; follow the questions below for a recommendation.
- Do I currently use another banker that can export to the QTI 1.2 or QTI 2.1 format? Yes: Use the QTI 1.2 or QTI 2.1 format. No: My current item banker exports to RTF format or another text format, or my items are currently in Word documents or similar state. Proceed to Question 3.
- Do I have ancillary information to import, such as Author or Statistics? Yes: Proceed to Question 3. No: Use the Word XML format (if item text is rich/formatted ) or the simple text importer (if item text is plain text).
- Do I need to import tables or text boxes? Yes: Use the Word XML format to import items and images, then use the Import Statistics feature to import the remaining information.
Importing Item Metadata to Existing Items
If you want to update item metadata to existing items, you can import a .xlsx file with the desired changes. This is especially helpful if your items were imported with an import format that does not support metadata but only supports item content (such as the Appendix B – Importing Items as Word XML).
- To import metadata, you must first generate an import file.
- Right click on the bank or category that contains the items you wish to update and select Export → Item Metadata. This will download a .xlsx file that you can open, make changes, save a copy, and re-import. You can delete any columns that you do not wish to make changes to, but the UNIQUE ID column must remain intact.
The metadata you are able to change includes the following:


Note: When you save a copy of the exported file to a new location, it MUST be saved as an .xlsx file. By default, Excel will save it as “Unicode Text (*.txt)”, select Save As and change the file type to “.xlsx.” Importing will overwrite existing values and leaving a cell blank will cause that value to be erased.
Certain columns have specific requirements.
- The columns related to statistics fields must be numbers.
- The STATUS column must be one of New, Review, Active, or Retired.
- The VERSION column can only be changed by creating a new version of an item in FTW.
After making changes, and saving as a .xlsx file, you are ready to import the file.
To import the file, right click on a bank or category and select: Import → Item Metadata. It does not matter which you choose because the importer will use the ITEM KEY field. A dialog will appear which you can use to browse for your file and upload.
*Changes made to the .xlsx file and imported will immediately be reflected on FastTest. For example, changing the category of an item will result in the item being moved from the previous category item bank into the new category item bank.
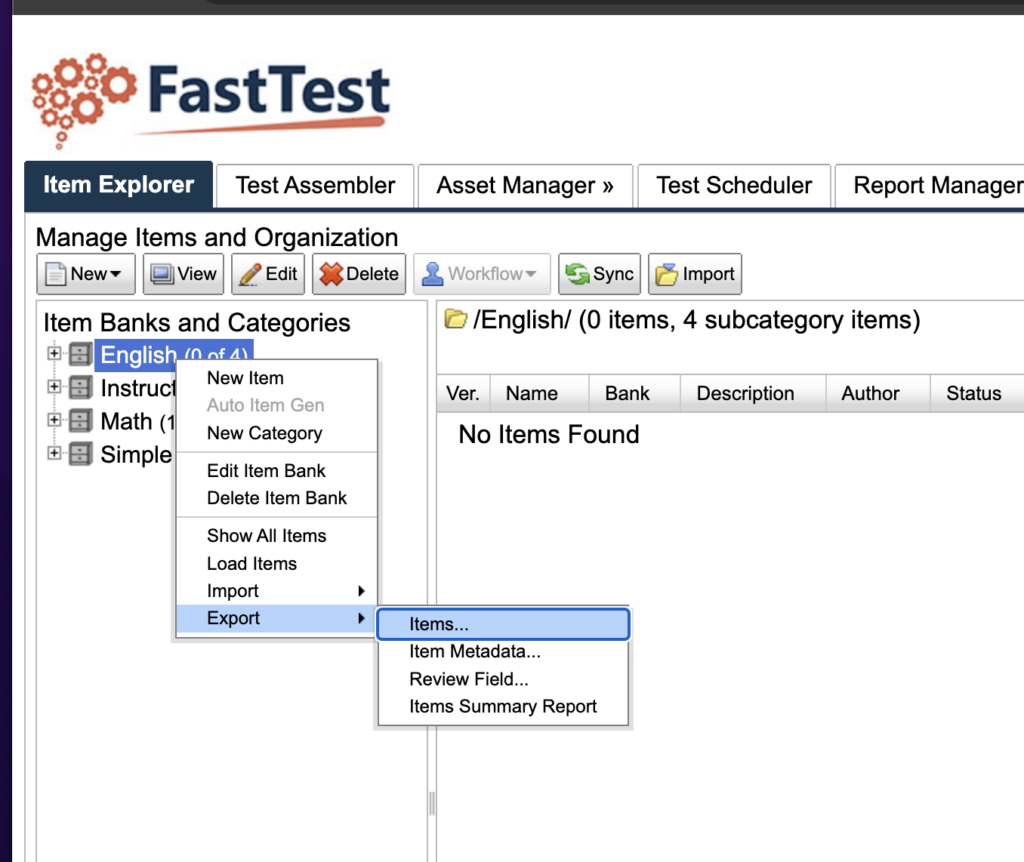
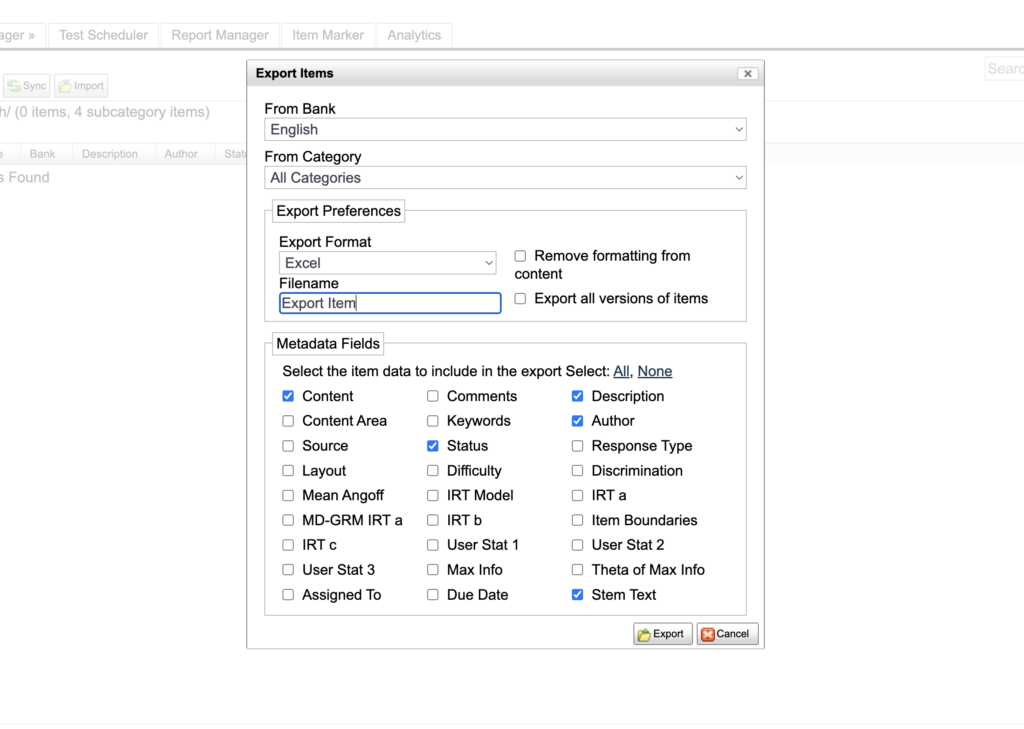
EXPORTING ITEMS
FastTest has the feature of exporting the items stored in the workspace
- Go to Item Explorer
- Right-click the item bank and choose “export items” or “item metadata”
- Choose the format , metadata and rename the file
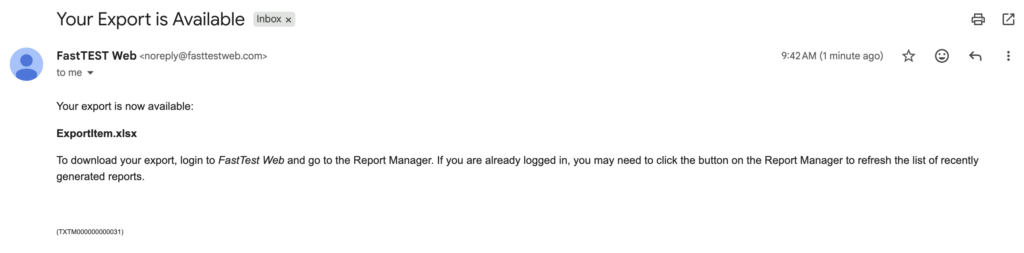
- An email will be received once the report is completed and ready for download
Figure 3.7: Exporting Items